Nullam dignissim, ante scelerisque the is euismod fermentum odio sem semper the is erat, a feugiat leo urna eget eros. Duis Aenean a imperdiet risus.
Nullam dignissim, ante scelerisque the is euismod fermentum odio sem semper the is erat, a feugiat leo urna eget eros. Duis Aenean a imperdiet risus.
 author
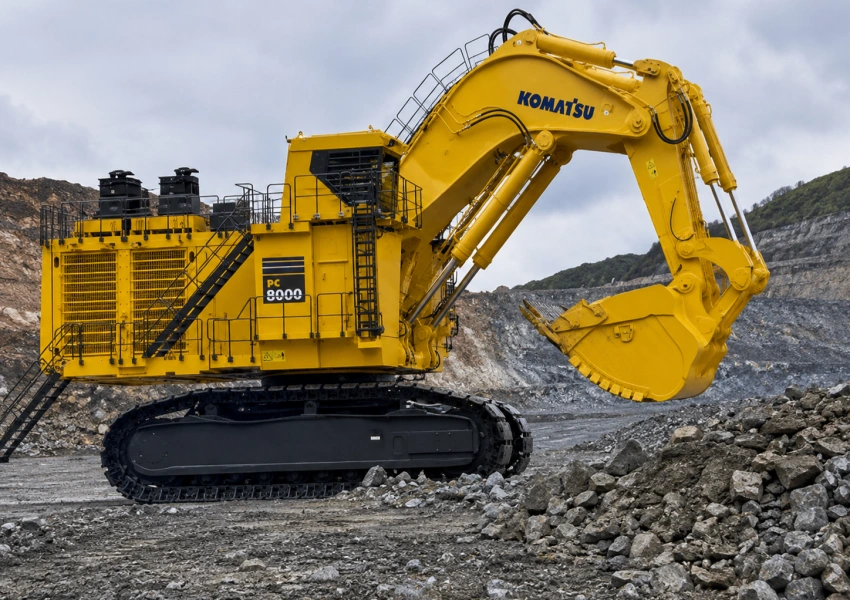
A new or remanufactured valve block should not go straight from the crate to the excavator just because the casting looks clean. The main control valve sits between the pump and every high-value actuator on the machine. If a spool hangs, a relief valve is set wrong, or a port has contamination left inside, the first working day after installation can become another removal job. That is why a main control valve test before installation is not extra paperwork. It is a downtime filter.
For repair shops, fleet owners, and parts buyers, the goal is simple: confirm fitment, pressure response, leakage control, and spool movement before the excavator control valve installation starts. YIKAN KOMSU positions the main control valve as the flow distribution point for boom, arm, bucket, swing, and travel circuits, so the test has to look at the whole valve behavior, not just one clean pressure reading.
The first check happens before oil touches the valve. Match the machine model, old valve tag, part number, port layout, pilot ports, mounting points, and relief-valve positions. A valve can look close and still be wrong. One misplaced pilot line can create joystick delay; the wrong relief setting can rob breakout force.
A practical check is to place the old valve and the replacement side by side, then follow each pressure, return, drain, and pilot connection with a marker or tag. The PC130-7 control valve is a useful example because it is tied to PC120-7, PC130-7, PC138US-7, PC160-7, and related 12-to-16-ton machines, with several interchangeable part numbers. That kind of model spread makes identification important, especially when a dealer stocks mixed inventory. The 723-57-11700 / 723-57-11800 hydraulic control valve is designed for Komatsu-compatible excavators such as the PC130-7, PC130-7K, PC130F-7, PC160-7, PC160LC-7, PC138US-7, and PC120-7. It controls hydraulic oil flow to key excavator functions and is suitable for construction and other heavy-duty applications. Related part numbers include 23-57-11801, 723-57-16101, 723-56-11501, and 723-56-11200.
Port layout is not only a casting detail. It decides whether hoses reach naturally, pilot pressure arrives at the right spool, and return flow has a clean path back to the tank. A main control valve test should record each port name and thread condition before bench work begins.
Relief valves and pilot ports deserve separate labels. A shop that mixes main relief, port relief, and pilot lines can pass a bench check but fail after installation. Clean tags help the installation team avoid a fault that looks like pump weakness.
Hydraulic valve quality inspection starts with cleanliness. Metal fines in the tank or dirt from an open hose can damage a fresh valve quickly. The replacement valve should arrive capped, dry on the outside, and protected from rust. Ports should be inspected with a clean light.
This is also the stage to check casting damage, plug torque marks, sealing surfaces, paint over sealing faces, and packaging debris. A small nick near a port seal can become a leak complaint after the valve is bolted down.
A valve that passes the bench can still fail if dirty oil is waiting in the machine. Before the excavator control valve installation, inspect the tank, suction strainer, filters, cooler, and major hoses. Installing a clean valve into a dirty system is only a short delay before the next repair.
Mechanical checks should feel boring. That is good. Plugs sit flat, seals fit cleanly, spool ends return without sticking, and protective caps stay in place until the line is ready. If a valve block needs force on the bench, it will not become better once buried under hoses.
A proper excavator valve bench test should not jump straight to full pressure. Start low. Let oil fill the galleries, purge air, and reveal obvious leakage. Then raise flow and pressure by section. Watch each spool, relief setting, pressure compensation behavior, and cross-port leakage.
YIKAN KOMSU uses calibration test benches for multi-spool flow and pressure testing before dispatch on its PC130-7 main control valve assemblies. That matters for buyers because a valve block controls simultaneous movement. Booming-up while swinging, arming-in while curling the bucket, or traveling correction on uneven ground all ask the valve to divide flow cleanly. Testing one spool alone misses part of the real load.

The first bench stage should use low pressure to find seepage, cracked fittings, loose plugs, and assembly mistakes. A low-pressure leak found here is cheap to fix. The same leak found after installation costs oil, labor, cleanup, and another complaint.
After the valve is wet and stable, test each spool and then combine movements where the bench allows it. Flow should rise and return without sudden jumps. Hydraulic valve pressure testing belongs in this same stage: main relief pressure, port relief pressure, pressure holding, and internal leakage should match the machine requirement and the supplier’s setting sheet.
This is also where the pump side has to stay in mind. The valve can only distribute the oil it receives. When a field problem mixes slow movement, heat, and weak pressure, compare valve results with the machine’s pump condition. The hydraulic pump gives buyers a clean supply-side reference when the valve test raises questions about the wider hydraulic system.
Relief settings should not be adjusted by habit. Low pressure makes a healthy machine feel weak. High pressure can overload hoses, cylinders, seals, and the pump. During hydraulic valve pressure testing, the test sheet should show the section, target pressure, measured pressure, oil temperature, and adjustment result.
Internal leakage is the quiet fault that bench testing is supposed to catch. Oil slipping across a spool or through a worn seat may not create an outside drip, yet it can steal working force and build heat. If the bench shows drift, unstable pressure holding, or unexplained flow loss, the valve should not be installed until the cause is handled.
A bench-tested valve still needs a clean machine. Before excavator control valve installation, flush suspect lines, replace filters, check oil condition, clean around the mounting area, and keep every open port capped until the hose is ready.
After installation, start with a warm-up and low-load function check. Move each function slowly, listen for relief noise, watch for hose movement, and confirm the oil level after air purges. If a function hesitates, check the pilot signal, hose routing, air, and contamination first.
Many replacement failures are not replacement-part failures. They are system-cleanliness failures. If the previous hydraulic fault produced metal, the machine needs more than a valve swap. Filters, oil, coolers, and pump condition all need attention before the replacement valve is blamed.
The first run should leave a simple record: oil temperature, pressure readings, response of each function, leakage check, and any adjustment made. It gives a fleet buyer a better way to compare suppliers than price alone.
The best supplier conversation is not only about whether a valve is in stock. Ask how the valve is tested, whether multi-spool flow results are checked, how pressure settings are recorded, and what information is needed for fitment. YIKAN KOMSU has more than 20 years in hydraulic maintenance, a case base above 10,000 examples, a 3,000-square-meter automated factory, CNC machining precision around +/-0.003 mm, and a stated 99.8% pass rate in its quality flow. Its hydraulic system work includes component selection, valve block design and manufacturing, tank and piping manufacturing, and system assembly testing. For matching, sample support, and after-sales guidance, the hydraulic component service page is the more natural handoff point.
For broader company and product context, the YIKAN KOMSU connects the valve, pump, motor, and hydraulic parts categories. A tested valve, a clean hydraulic circuit, and a supplier that can discuss product and system behavior give the machine a better chance to go back to work once, not twice. YIKAN KOMSU supplies non-OEM hydraulic replacement parts compatible with Komatsu equipment, manufactured to meet aftermarket maintenance requirements. For more detail, see our guide on this article.
Q1: What should a main control valve test include before installation?
A1: It should include fitment checks, cleanliness inspection, low-pressure leak testing, spool response, relief pressure checks, internal leakage checks, and a first-run record after installation.
Q2: Is an excavator valve bench test enough to approve the valve?
A2: It is a strong step, but the machine still needs clean oil, clean hoses, correct pilot routing, good filters, and careful start-up checks. Bench testing cannot fix contamination already inside the excavator.
Q3: Why is hydraulic valve quality inspection important for buyers?
A3: It reduces the risk of repeat removal, oil leaks, wrong pressure settings, sticky spool behavior, and warranty disputes. A clear test record is often worth more than a slightly lower part price.
封面图-ps压缩版、.png)